Mounting Tips and Ideas
Some methods/things I use---
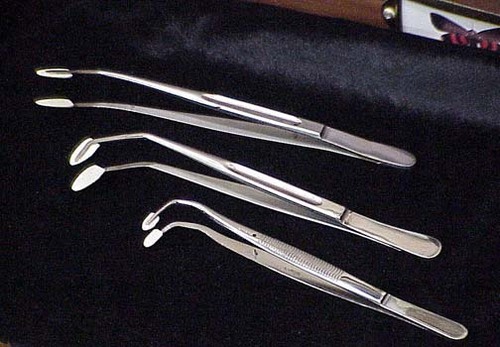
I use these custom forceps to grab wings from the side and move into position. Each forcep is tipped with vinyl pieces with rounded edges so as to not damage wings while positioning. The edges are rather flat so I can get underneath fhe wing edge for placvement.
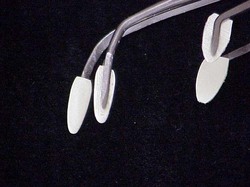
Close-up of tips
Vinyl pieces are glued with super glue to the forcep tips after I've bent them.
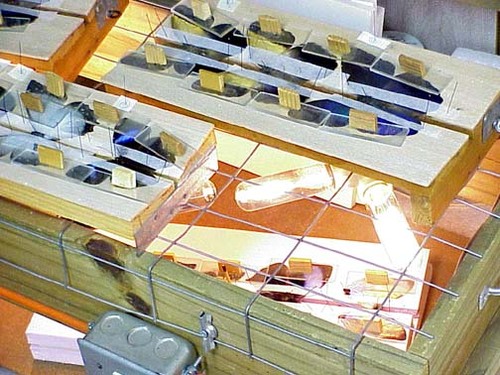
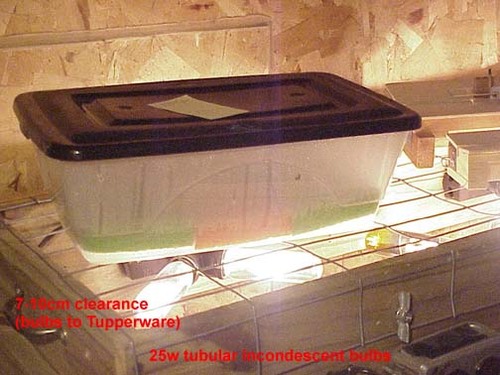
My drying rack
This drying rack works great to both thoroughly dry specimens and to do it in a shorter time. The bulbs are 25w tubular and the spreading boards are a few inches above the lights. Having them bring heat up and around the bugs dries them fast. Both the rising heat and drier air from the humidity-controlled room going around them removes moisture. The key here is to provide a means for air movement. Warmer air rises and brings up the dry air from underneath as well.
Drying rack with specimens underneath lights
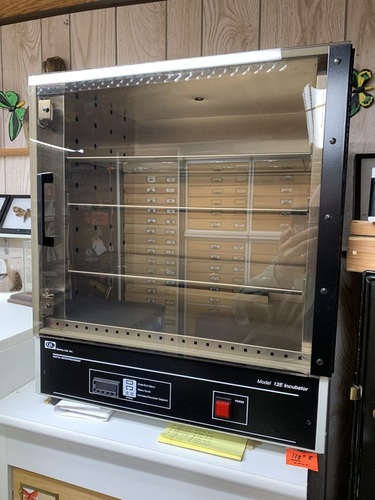
Now I use this forced air lab incubator to dry my specimens. It is set to 115 degrees F and what would take days or weeks is dry in mere hours. Three things to know....1. If drying a fresh caught bug, let it dry for two days first so as to get the outermost exoskeleton dry and not still flexible and softer. 2 be sure have all wing surfaces covered so as to prevent curling. 3. After you're done, let the mounting board w specimen sit at room temp for an hour or two before moving slides or paper strips. Lastly, you'll have experiment, but my drying time for typical butterflies is 15-18 hours and larger moths, it's more like 24-30 hours. This also kills any pests that may be on or in specimen....like one you may have received that was papered papered.
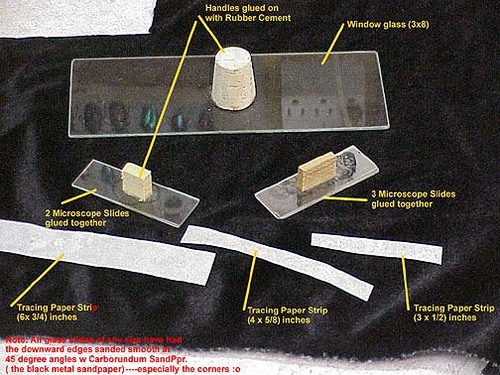
Glass slides and tissue-paper for wing matters
The slides are glued with rubber cement together making them heavier. I also glue knobs on the slides to make manipulation easier. Although the print in the lower left is hard to read, it mentions that I use carborundum paper to sand the edges of the glass to 45 degree angles, thus minimizing any wing damage from the glass edges cutting into the wings.
I weight the wings down when starting with the glass and then I pin the tissue paper pieces over the wings near the body. Then I remove the glass and position the wings with the forceps. As each wing is positioned, I place a slide on to hold it in place. When done, both the tissue paper strips and the glass slides hold down the wings in the correct position. Glass slides on the wings (especially at the outer edges) really help to prevent wing curling at the tips:)
One of my Softening Containers on the drying rack
This container on the rack will soften up specimens quite quickly.
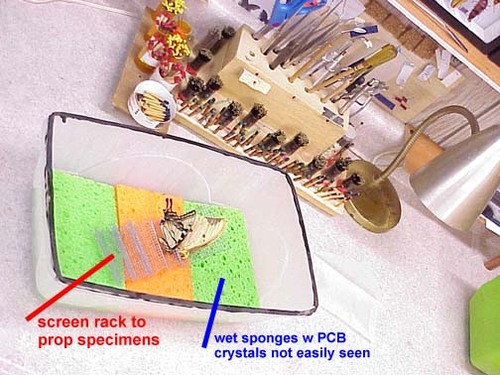
Inside the Softener Container
The wet sponges with PCB crystals and screen specimen racks on the sponges works great for me. Most lepidop specimens are softened in 4 to 7 hours depending on the size. Most coleops are softened in the same time frame depending on size. Each groove of the screen specimen rack has a number with abbreviated species name for matching up later on with data and labels. As with any method, one must be careful to allow enough time to soften properly. Any stiffness with the bug should mean a return to the chamber for a while. The PCB crystals ward off mold. Putting the lepidops on the screen prevents the wings from touching the wet sponges.
